


Photo by Nick Morrison on Unsplash
Make your first Javascript mini-project
A simple background color changer app


Table of contents
- "A simple background color changer"
- So what did you use to make this app?
- 1/4 - PREPARING THE STAGE
- 2/4 - Writing the HTML
- 3/4 - Making it look pretty (CSS)
- 4/4 - Making the button work using JAVASCRIPT
- Writing the function :
- Code Explained
- So This is how the javascript code should look at the end
- 🎊And we are finally done ! 🎊
- Thank you, I tried to explain as much as possible and hope it was helpful for you, Happy coding ahead!
"A simple background color changer"
Not the fanciest javascript app out there but it's just enough to give you that taste of what Javascript is capable of. So let's get started right away.
So what did you use to make this app?
I used only HTML, CSS and JAVASCRIPT to build this.
🟠HTML - to write the text and add the button
🔵CSS - to make the text and button visually appealing
🟡JAVASCRIPT - to make the background color change work
1/4 - PREPARING THE STAGE
Create a folder named "Background color changer" and create three files inside of it according to the image here:
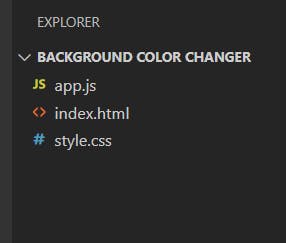
Done? Cool! So these 3 files are the only thing we need to make the app. Now let's write some code.
2/4 - Writing the HTML
Add the following code in the HTML file and notice the div named "box" as shown below.
<!DOCTYPE html>
<header>
    <title>Background color changer</title>
</header>

<body>
    <div class="box">       </div>
</body>

</html>
This "box" is where we will be putting all of our text and the button in.
By the way, if you didn't know, every single thing in the HTML document is in the form of boxes! So here's the box view of the arrangement we are going for.
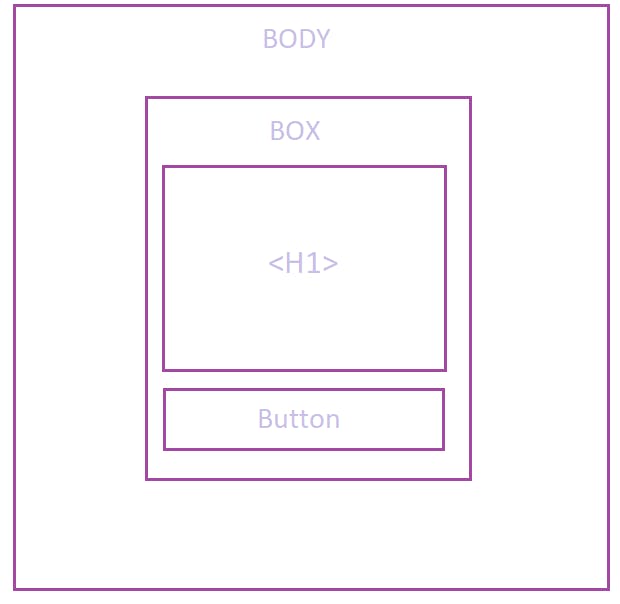
As you can see, the <h1> and button will be inside the "box container". This will be helpful during the CSS part.
Now, let's add the <h1> and the <button> elements inside the "box" div.
<div class="box">
        <h1>Background Color Changer</h1>
        <button id="color-button"> Change Background</button>
</div>
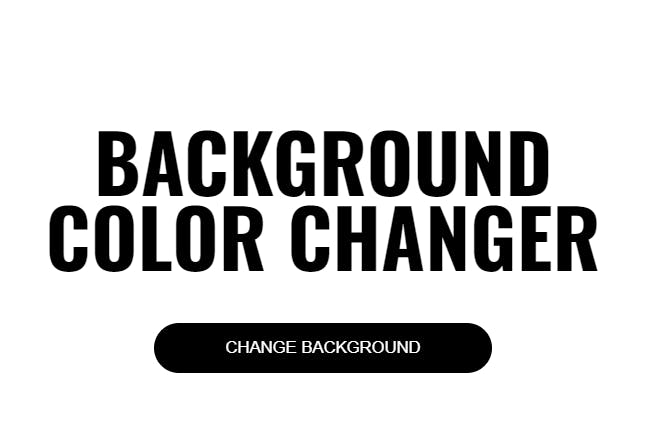
Save your HTML file and open it in a web browser. This is how it should look :

Good job!! We are done with the HTML part for now!
3/4 - Making it look pretty (CSS)
Those 2 elements (h1 and button) are all we need for making the app but it looks quite ugly now so let us add some CSS code to make it look better.
Simply copy and paste the following CSS code into your 'style.css' file.
@import url('https://fonts.googleapis.com/css2?family=Oswald:wght@700&display=swap');

*{
    margin: 0;
    padding: 0;
}

.main{
    width: 450px;
    margin: auto;
    margin-top: 10%;
    padding: 40px;
    text-align: center;
}

.main h1{
    font-family: 'Oswald', sans-serif;
    font-size: 400%;
    line-height: 60px;
}

.main button{
    background-color: black;
    color:white;
    border-radius: 50px;
    padding: 10px;
    margin-top: 40px;
    width:270px;
    cursor: pointer;

    transition: all 0.1s ease-in-out;
}

button:hover{
    transform: scale(1.1);

}
Make sure you have linked this CSS file into the HTML within the <header> tag as shown below:
<header>
    <link rel="stylesheet" href ="style.css">  <!--add this line -->
    <title>Background color changer</title>
</header>
Cool, now save both files and open the webpage, this is how it should look:
4/4 - Making the button work using JAVASCRIPT
Now what we want is when we click the button the background color should change.
So we need to make sure we tell javascript which element we are talking about! And to do that, we first access them and then give them some names. Here's how:
Open the JS file you created earlier and add the following.
const myBtn = document.querySelector('#color-button');  //Here,simply we are telling JS whenever we use "myBtn" , we want to access the button.

const bgColor = document.querySelector('body');   //Here, we are accesing the  <body> container with the name "bgColor"
Now we just need to make a list of the colors we would like to randomly change to :
Say Red, Pink, Purple, Blue or whatever you would like. We are going to store them in an array named "myColors" like this:
const myColors = ['red', 'darkblue', 'green', 'purple', 'orange', 'violet', 'yellow','pink']
You can add more colors to increase the variety if you would like.
Now what we want to do is when we click the button, the button should tell javascript that we want to change the background color.
To achieve that, we just need to attach a function to the button that will trigger when we click on the button.
In Javascript, this is how you do it.
color-button.addEventListener('click', functionName);
Here the 'addEventListener' waits for a click on the button that we have assigned to it, which in our case is the 'color-button '. So once the button gets clicked, it will execute the function that we provide in place of 'functionName'.
Now we just need to write that function and we are done!
Writing the function :
Let's name our function 'changeColor'.
We need only two lines of code as shown below.
function changeColor() {

    x= Math.floor(Math.random() * myColors.length);  //line1
    bgColor.style.backgroundColor = myColors[x];     //line2
}
Looking too complicated? Don't worry, it's fairly simple.
Code Explained
🟡On line 1, a random number is being generated and stored in the variable x. The Math.random() function returns a random number between 0 (inclusive) and 1 (exclusive).
The result is then multiplied by the length of the myColors array (using the * operator), and the Math.floor() function is used to round the result down to the nearest whole number. This will give us a random index for the myColors array.
🟡On the second line, the bgColor element's style property is accessed and its backgroundColor is set to the value of the item in the myColors array at the index specified by x.
⭐For example, if myColors is an array that contains the strings ['red', 'blue', 'green'], Math.random() might return 0.6, which would become 0.6 * 3 = 1.8. Math.floor(1.8) would then be equal to 1, so x would be equal to 1. This means that bgColor.style.backgroundColor would be set to the value 'blue'.
So This is how the javascript code should look at the end
const myBtn = document.querySelector('#color-button');
const bgColor = document.querySelector('body');

const myColors = ['red', 'darkblue', 'green', 'purple', 'orange', 'violet', 'yellow','pink']

function changeColor() {

    x= Math.floor(Math.random() * myColors.length);  //line1
    bgColor.style.backgroundColor = myColors[x];     //line2
}

color-button.addEventListener('click', changeColor);
🎊And we are finally done ! 🎊
